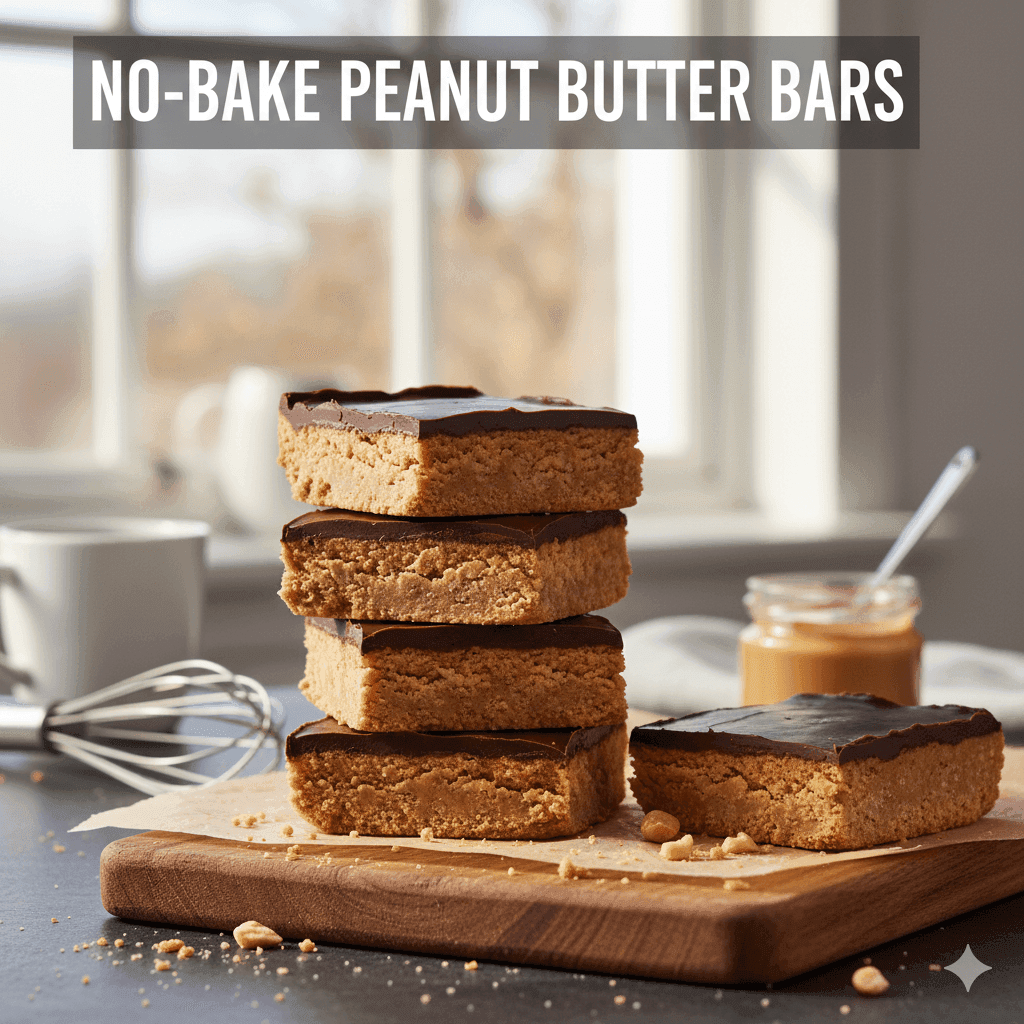
No-Bake Peanut Butter Bars: The Ultimate Guide
We’ve all been there: a sudden, intense craving for something sweet and salty hits, but the thought of preheating the oven and scrubbing flour off the counters feels like a marathon. Whether you need a last-minute potluck contribution or a late-night snack, the struggle to find a dessert that is both effortless and indulgent is real.
Enter the no-bake peanut butter bar. This classic treat is the “holy grail” of simple snacking, combining the creamy richness of peanut butter with the satisfying snap of chilled chocolate. In this guide, you’ll learn how to master the perfect ratio of ingredients, avoid the dreaded “crumbly base,” and elevate this childhood favorite into a gourmet-style square. Let’s dive into the world of no-bake perfection.
The Science of the Perfect Texture
The magic of a peanut butter bar lies in its structural integrity. Unlike baked cookies that rely on eggs and gluten for strength, these bars use a combination of fats and dry binders to stay firm.
Most recipes utilize graham cracker crumbs or oat flour as the base. When mixed with melted butter and peanut butter, these crumbs hydrate and create a “dough” that sets firmly in the refrigerator. The key is ensuring your peanut butter is creamy and emulsified; using natural oils that separate can sometimes lead to a greasy finish.
Key takeaway: Achieving the perfect bar requires a precise balance of dry crumbs to fat to ensure the base doesn’t fall apart when sliced.
Why You Should Skip the Oven
In 2024, efficiency in the kitchen is more valued than ever. Moving away from traditional baking offers several modern benefits:
- Energy Efficiency: No need to run a high-voltage oven for 20 minutes.
- Temperature Control: Keep your kitchen cool, which is essential during summer months.
- Kid-Friendly Prep: Since there’s no heat involved (outside of a quick microwave melt), it’s the perfect activity for little helpers.
Implementation Guide: Step-by-Step Perfection
Follow these steps to ensure your bars look like they came from a professional bakery:
- Prepare the Base: Combine 2 cups of graham cracker crumbs, 1 cup of powdered sugar, and 1 cup of melted butter. Stir in 1 cup of creamy peanut butter until a thick dough forms.
- Press and Level: Line an 8×8-inch pan with parchment paper (leave an overhang for easy removal). Press the mixture firmly into the pan using the bottom of a flat measuring cup.
- The Chocolate Cap: Melt 1.5 cups of semi-sweet chocolate chips with 2 tablespoons of peanut butter. The extra peanut butter in the topping prevents the chocolate from cracking when you bite into it.
- The Chill Factor: Smooth the chocolate over the base and refrigerate for at least 2 hours.
Common Mistakes to Avoid
One of the most frequent errors is cutting the bars while they are too cold. If the chocolate has been in the fridge for hours, it will shatter when the knife hits it.
Another mistake is using “natural” peanut butter (the kind you have to stir). While delicious on toast, the high oil content can make the bars mushy at room temperature. Stick to conventional creamy brands for the best structural results.
Pro tip: Run your knife under hot water and wipe it dry before each cut to get those perfectly clean, “Instagram-worthy” edges.
Best Practices for Storage and Gifting
To keep your peanut butter bars fresh, always store them in an airtight container in the refrigerator. They will stay fresh for up to a week, though they rarely last that long! If you are gifting them, layer them between sheets of wax paper so the chocolate tops don’t stick to the bottoms of the bars above them.
Conclusion No-bake peanut butter bars are more than just a nostalgic snack; they are a versatile, reliable solution for any dessert emergency. By focusing on the right ingredients and allowing for proper chilling time, you can create a treat that rivals any store-bought alternative. Ready to become the hero of your next gathering? Grab your mixing bowl and start pressing that base!
About RECIPERED
View all recipes by this author